Saturday, 1 July 2017

From Black to Blonde Hair

Changing It Up

For the past 5 years I have been dying my hair from my natural blonde to black and I've finally decided to try and get back to blonde after so many years of battling with the bright roots. Looking online I didn't find many people who have been dying their hair for as long as I have and managed to change their hair without damaging it to almost straw like texture. Through this blog post I will let you know all the products I have used to get it back to blonde and keep it healthy. 

The First Attempt 


 Doing my research into other people trying to get any shade dark like mine, either black or a very dark brown, I came up with a few options but looking at reviews and YouTube videos I found this Garnier Olia Super Blondes Extreme B+++ which had the best reviews and even a hairdresser commented saying it is better for the hair than the products they use at the salon which really peaked my interest. Since I've had black hair for so long I brought 2 boxes on a 2 for $11 deal and got started with the help of a friend who has stripped her hair before so knew what to do with it as it is different from just dying your hair. Reading the intructions carefully we set to work mixing the bleaching powder and bleaching cream into the developing cream putting the multi-application conditioner to the side. Putting my fringe in a bun with most of my hair apart from the bottom layer she set to work covering my hair as close to the roots without getting it on the blonde then worked her way around my hair, this took up a bottle and almost half of the second one. We left it on for around half an hour even though it says to leave it for maximum of 25 minutes but as I have so much black in my hair I left it in for a little longer to get more of an effect. For the rest of my hair she used the rest of the second bottle until it was empty massaging it into the rest of my hair to make sure it was fully covered and into my roots as some parts started to go platinum blonde and I didn't want it to be so miss matched so all platinum is better than  patches of it. Overall we spent around an hour and a half developing with another half an hour minimum making sure it fully covered all of my hair. To wash it out we put warm water into a water bottle then poured as we massaged it out until it was out then added the conditioner before leaving that for 2 or 3 minutes before
using the shower to rinse it out fully.

Once I towel dried it enough I used my life saving Organic World Brazilian Keratin that has been making my hair healthier for the past month I have been using it. My hair didn't feel any different apart from being slightly dry afterwards but putting this on before using my hair dryer let the oil sink into my hair. As you can see at the roots it has gone platinum then went into orange with the rest of the hair being dark ginger with a black tinge so I will need use some more dye to even it out hopefully making it either the platinum blonde or the bright orange which I am totally loving! If you have been dying your hair or have hair damage then I would highly recommend using the hair oil and if you have been dying your hair and fancy a change without damaging it further then I would highly recommend the Garnier Olia brand as it doesn't damage it at all! Me and my friend were really surprised how well it took to my hair considering how long I have been dying it for and how nice my hair feels afterwards. I'm not sure how long I have to leave it before dying it again so I'm giving it a week before using another two boxes mainly focusing on the darkest point which didn't dye as well as the roots or close to the roots so we have already planned to put my hair in ponytails to avoid getting any more on the roots or close to it and stop the bleach going completely everywhere like it seemed to the first time.

The Second Attempt

Another trip to Superdrug down and two more boxes of the Garnier Olia Permanent Bleach later we started on my hair again this time we covered my fringe, both sides then the back/top and left to develop for at least an hour. This time we could see white, pink, ginger, light brown and dark brown starting to form leaving the black behind! I actually love how my hair turned out! We did get the roots again so they are back to platinum and in one place white, but it all seems to blend now and is really less patchy than it was the first time!. Using the conditioner in my hair then leaving it for 3 minutes to settle helped it feel alive again as well as the Organic World Hair Treatment I use almost every time I wash my hair. There might be a gap in this blog post as I am getting the back of my neck tattooed so I have to wait for it to fully heal before doing anything to my hair so it doesn't get into the healing tattoo but as soon as I decide what I am doing I will add to the blog post! I really hope this helps you change your hair without killing it! I would say for best results to use this product all at once all over the hair (if you are wanting to bleach all of it of course) then leave for about an hour even though it says to leave for maximum of 45 minutes and to invest in the Organic World Brazilian Keratin as it is only a pound from Savers and has worked miracles on my hair!

The Third Attempt

I gave it a few weeks before trying it again, not only was I waiting for payday but I also wanted to give it time to settle before using bleach on again so I brought another two boxes of the same Garnier Olia Permanent Bleach and got to work. This time we wrapped the parts of the hair which needed to develop faster than the rest in tin foil as a person I work with who used to be a hair dresser told me it would help even the colour out around the whole of my head. We left it on for the same 45 minute time but didn't check on it as we didn't want to unwrap the tinfoil and have to put more on as it would be a waste. My hair still feels very soft, hasn't lost any shine and it is still a natural colour!. We could tell even from washing the bleach out that it had pulled a lot more colour out! The brown was completely gone and instead a really nice blonde/light ginger colour was there. It still isn't completely what I am hoping for but for now I am just going to try some shampoos to get rid of the brassiness and bring out some more blonde then I'll check in and let you know how it went!.


The Forth Attempt

It wasn't long before I headed back to Super Drug to see if they've restocked and to my luck they had another 2 boxes which I sold them out of again. This time my boyfriend wanted to do it so I put my trust in him, applying like usual leaving for around 40 minutes this time while we played a bit of Xbox. I noticed a difference as soon as I washed the bleach and the conditioner out with the slightly dark ginger going more and more bright and some more blonde peaking through. My hair still feels amazing and the bleach hasn't effected it at all! I am finding I need to wash my hair less and less (probably twice a week now) as it just doesn't seem to get oily/greasy! There were a few little bits he missed but I am hoping using the shampoo will make it at least blend a little more into the hair colour now. I think I am going to leave it for a little longer now, a few months as I want to see how the shampoo does to help lift some of the colour out and make my root go lighter as they grow. Wish me luck! I'll keep updating!.

Shampoo

Talking to a hairdresser I work with they were telling me to buy some shampoo to remove the brassiness from my hair and to help the blonde come through so I brought two John Frieda shampoos to try and help my hair along without using more bleach on it as Super Drug had a 2 for $11 deal on so it is worth a try. The first one I brought is the Sheer Blonde Colour Renew Shampoo which is meant to banish brass tones and orange as it cleanses and the second one I brought is the Sheer Blonde Go Blonder Shampoo which is meant to renew the hair's healthy appearance and touch without drying it out so I am feeling hopeful this will make a difference. I will use the renew shampoo on the orange parts of my hair then the go blonder on my roots where the blonde actually is and hope it makes a difference.

 I've used the purple shampoo around 3 times now and I have noticed a difference, not only does it make my hair look a long brighter but it completely blends now! (aside from the platinum roots but they seem to look good!). I have used the go blonder once but as I have been out and about quite a lot I tend to just take the purple shampoo with me instead as it is something I need a lot more. I will update with images when I start to notice a big difference and I'll let you know how many washes it took!

I've been using the shampoo for about a month now and it has changed slightly however it hasn't changed it much so I've decided to bleach it again.

The Fifth Attempt

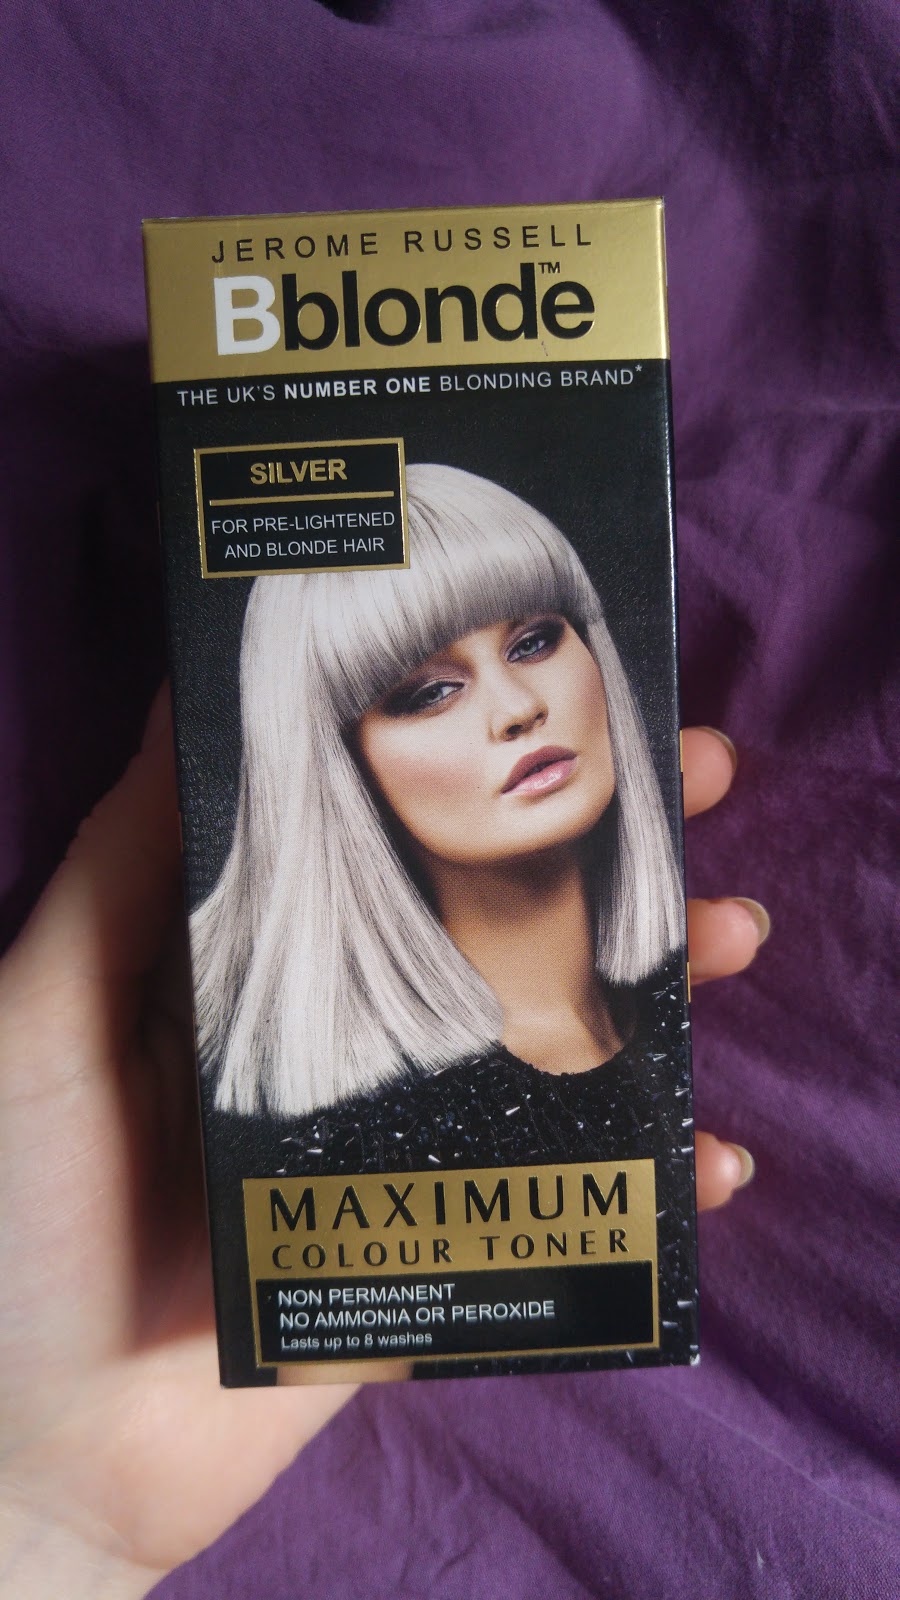
What a difference! I was starting to loose hope with my hair as the past few times I've bleached it I didn't seem to budge the orange hair really and this time I chose to do it on my own as my roots were coming through really badly (damn the cooler tone to my natural blonde looking almost grey against the platinum). This time the colour seemed to really lift and brighten, the roots going an almost yellow shade instead of the white it went a few times before which looks a lot more natural. There is a little bit of a light orange colour left so I used the Jerome Russell Bblonde Maximum Colour Toner which was the only toner in my local Superdrug as a few people told me using a toner would really help so straight after bleaching I towel dried my hair then my friend came over to help just put the toner on the orange parts as the worst thing would be the rest of my newly natural hair turning silver! Looking at the instructions we followed them almost exactly as they say (we didn't have a plastic hood so improvised with a sandwich bag then didn't pile it on top of my head to stop the toner from going on the platinum parts). My friend used the hair drier until it had been the 5 minutes then we played a little xbox until it was time to wash it out. As it is such a thick purple you couldn't see any difference until you washed it out as it looked darker with it on. We didn't notice much of a change which is a shame, maybe if it was the whole head or if it was a darker orange it would of worked better, I'm not sure which one, but I won't be using it again. I think I'll stick to the shampoo still. I'm not sure if this will be the last time I will bleach it as there are still parts of it but for now I am happy with the colour, not only is most of it a light blonde but the orange parts look more like a strawberry blonde than anything else. 

Thank you for reading through this long blog post on how I changed my hair, the thing that I most learnt was after years of trying to change how I look because I didn't feel confident with how I looked with my natural hair is that I have gained confidence through each session of bleaching my hair now. I know I could of chose a more harsh bleach or actually used proper bleach but considering I have used 10 boxes in total my hair feels like normal! No change at all in it! This is why I would highly recommend it to anyone thinking about lightening their hair to bleaching it and it didn't work out that expensive. 


Tuesday, 6 June 2017

Look Fantastic Benefit Box - Products I Received and Review

Look Fantastic Benefit Box

This is the first time I have used Look Fantastic but I've heard good things about their subscription boxes and their collab boxes so when I saw this advertised on Instagram I had to get it as not only will I get to try a Look Fantastic box but it is also Benefit which I love! A little background on Look Fantastic to start off with; Founded in 1996, lookfantastic.com is the original British beauty boutique and today they are Europe's number one retailer for beauty. They are not only a shop but run a monthly beauty box with surprise brands from high end to high street catered to the questionnaire you fill out or work with one brand to create a beauty box filled with classics and new releases.

As soon as it arrived in the post (it took around 4 days to arrive in the post after ordering) I opened up the postage box to reveal the beautiful box design. Not only will this work as good storage like my Birchbox ones do but it also looks nice on the side with the pattern, obviously it is a little stiff to get the lid off as it is new but as soon as I managed to get the lid off I noticed the quote in the lid "Laughter is the best cosmetic...so grin and wear it" from Benefit which is a really nice touch to it. Not only is there the beauty products but also a Look Fantastic beauty book on the Benefit Edition talking about what's in the box, Benefits' story line, about the beauty box subscriptions they do, how to do perfect brows at home using the products inside the box, which brow product they recommend for you, q&a with Lisa Potter Dixon (Head Makeup & Brow Expert at Benefit), q&a with Patricia Bright (lookfantastic ambassador and blogger) and q&a with Lydia Miller (lookfantastic ambassador and blogger). It does have some really helpful tips with how to use the products in the box and how to use these brow products as the only thing I have used is a dip brow pomade.


Not only is the box nice but how they've packed the products inside is really nice with the pink tissue paper wrapping it all together being held together with a sticker saying the box hashtag #LFBEAUTYBOX pushing past the tissue paper it revealed the products inside; a full size Roller Lash Mascara, travel size Gimme Brow in 3, travel size Ready, Set, Brow!, travel size Porefessional Matte Rescue, travel size new (and exclusive for now) Hoola Quickie Contour Stick, a brow measuring stick, sample of the It's Potent! Eye Cream, sample of Total Moisture Facial Cream and a sample size of Boi-ing Airbrush Concealer No.2. Considering the price of the box ($35.00 excluding postage) you really do get a lot for the money! I have already got a travel size of the Porefessional Matte Rescue and I did buy the Double Boi-ing Concealer so I will do a quick little review but not a full one as I am going to save it for when I go away and need a smaller size.
The first item I was dying to try is the new Hoola Quickie Contour Stick as I haven't even tried the original Hoola yet so getting the newest product is really exciting. I first swatched it on my hand as I am really pale so I normally have to have an ash tone contour to stop it looking so orange but this one looks more like my dip brow pomade! I tried it on my face and it did look a little dirty on my skin tone but it is smooth with a buttery formula. I am going to see if the original Hoola is any better on my skin tone as this one doesn't unfortunatly. I would say it is worth giving it a go thought as it is a really nice looking contour for summer time as the forumla is so buttery and you can't feel it on the skin.

Porefessional Matte Rescue is one of my favourite primers for every day use, not only does it help fight my oily skin while I am wearing make up or just want a oil free day but it makes my skin feel soft and like there isn't any product on it. I have noticed a big change in my skin since using it (oil wise) as I do struggle especially at work or in summer time in general as sweat tends to make my skin look even oilier. I won't right a big review on this product as I did get it in my Birchbox this month as well so I did do a larger review on it for that blog post (last week) but if there is anything you want to know about it then drop a comment down below and I'll answer any questions.

I tested out both the brow products (Gimme Brow and Ready, Set, Brow!) in the same day. The shade for the Gimme Brow is number 3 which is too dark for my now blonde/ginger hair but would of been perfect with my black hair. I've never used any gels before to do my brows, instead using pomades as I find them easier to work with but wiggling this through my eyebrows was quick and easy, my brows stayed in place all day and kept their colour even when I run a finger over them. This is definitely a perfect one for summer, it is even splash proof (it was drizzling outside) without loosing pigmentation or smudging in the slightest. I really like the applicators on these but I did use a usual duo brow brush to neaten it up a bit as it will take a bit of time to get used to using a brush all the way along.

 The full size product I received from them is the Benefit Roller Lash mascara (shade black) since I looked on the back I was hooked on the look of the brush (the bristle lengths perfect to covering every lash and the curved shape perfect for the eye). The packaging is as cute as the other Benefit products and the bottle is simple but pretty, I love the fact the lid is almost a grippy plastic coating for less stress on holding the lid. My lashes do look really good after application, they look slightly longer but nothing too noticeable, it didn't smudge throughout the whole day of wearing it. I did like that it was quite easy to remove, I've been having trouble with a different brand with how rough it is to my lashes to remove so this was a pleasant surprise. I definitely think I will buy it again when it runs out as it is a good day mascara.

As the samples are quite small I won't be writing about the It's Potent Eye Cream and Total Moisture Facial Cream as I'm going to save them for trips away to save on space in my travel bag. The last tester was for Boi-ing no.2 which I already have (in the double Boi-ing cream concealer) is too dark for me so I will probably give it to a friend who will match to the shade better.

Overall the box is 100% worth the price, at $35 you get 1 full size product, 4 travel size (1 being a brand new product not out yet) and 3 testers which gives you a chance to see if you like the product before making a decision on buying the full thing. These are still in stock if you want to buy one for yourself with the link down below.


https://www.lookfantastic.com/beauty-box/lookfantastic-x-benefit-limited-edition-beauty-box/11400443.html?widget_id=616286


Tuesday, 30 May 2017

The Body Shop Mini Haul - Which Products I Got and Are They Worth It


The Body Shop

The Body Shop have been around for 40 years, using all natural produce inside the products to make it as organic and healthy for you as possible. Known mostly for their skin care products they have recently (in the past 3 or so years) starting creating beauty products, from brushes to blushes so naturally I have been dying to try them!


While I was in the shop I swatched a few of their foundations  hoping to find one which is close to my shade as the main issue I have with foundations are them looking good in my bedroom or bathroom lighting but outside in natural light I look orange or it oxides to orange later in the day but reading reviews I had heard very mixed reviews, another blogger was talking to me about how she broke out in little white spots all over when she used it so I was a little optimistic to try it out in case I broke out as well. The shade isn't exactly the correct shade for me but I used the next product with it mixing it together and created the perfect shade for me! I wore it to work with a little of the Benefit Porefessional Mattifying Primer underneath and not only did it last all day but it felt very comfortable on my skin like I wasn't even wearing a foundation. The shop assistant told me it is light to medium coverage so I did have to use a little concealer just to cover up a few blemishes I have been struggling with. Taking it off I didn't notice any break outs until the next day when I had a break out or two but it wasn't anything too bad just my skin adjusting to the formula as my normal every day foundation has break out prevention in the formula. It is a little on the expensive side at $15 for a bottle but I think it is worth it for when you want a light weight foundation which isn't thick or high coverage and it being all natural you don't have to worry about chemicals hurting your skin.

I had seen their Lightening Shade Adjusting Drops all over Instagram with reviews on how well it has worked and how people can finally have their skin tone with any foundation they choose by just adding one or two drops which of course enticed me as I really struggle to get a foundation which is my skin tone and will stay on all day then if I find one which is almost my tone it seems to oxides and go orange which isn't ideal. I used 2 or 3 drops to get it to my shade but it was well worth it! It didn't seem to change the formula or water it down what I was worried about happening so I am really pleased with it! I used it with the foundation I brought from the haul and with another one I have been using for months and it worked just as well. For the size of the bottle $10 is really cheap considering how a little of it really goes a long way.

As there was a 3 for 2 offer I talked to the assistant about my skin and she suggested trying the Tea Tree Oil Anti-Imperfection Daily Solution to help my oily skin balance out. I had seen a lot of people on YouTube and Instagram using oils in their skin care routines but never really branched out until now and I have to say I love it! My skin has never looked better, my make up stays on longer and I have only been using it for a week! She told me to use it after cleansing and toning before moisturising so I have followed her instructions in the morning and at night and I really have noticed a difference, when my pomade dries out I have used it and it has worked really well! I need roughly 4 drops to cover my whole face but the bottle is decent, I love the dropper as I have issues with my hair oil which is in a push cap (it goes everywhere and you can't control how much is coming out) and it feels amazing. If you have oily skin as well this could really work out for you like it has for me, the assistant said 'you have to fight oils with oils' and I'm finally starting to see that and at $13 per bottle it is worth trying it out!.


While I was at the check out not only did I sign up for the Love Your Body Club but I also got a $10 off voucher to spend in store during June which will be handy for my next Body Shop Haul!.


https://www.thebodyshop.com/en-gb/?gclid=CjwKEAjwsLTJBRCvibaW9bGLtUESJAC4wKw1I3P29KOL4uuw8iYDvGKzKWUHJV3oRbgNa4sAY0PUfhoCsr_w_wcB&dclid=CN_6746jmNQCFZI-GwodyBYLag


Gosh Lumi Drops


Gosh Lumi Drops


Per Cheek Bone
On The Face
Since I have heard about Gosh releasing this highlighting liquid I have been dying to get my hands on it and I've finally plucked up the courage to buy it! As I always use powdered highlighter I thought I would change it up for summer to give myself more of a natural looking glow which I can build on without having to wet a brush or layer making it look like chalk. I really like the idea of being able to blend this with my beauty blender into my foundation or even mix with my foundation to give my whole face a refreshed look. It is a sparkling highlighter which I was worried about to start off with when I swatched on my hands but adding the drops to a beauty blender seems to mute the sparkles to a normal glowing look instead of as glowing as the swatch on my hand. Deciding i couldn't wait I applied my make up then added a few drops onto my damp beauty blender then started dabbing into my face lightly following my cheekbone up then adding to the tip of my nose and cupid bow. I tried to get a photo of it in the light but if you can't see it that well it is because between the light and my phone I couldn't get it to gleam at the same time! Over all it was a nice change using this instead of the powder. I think if I was going out then I would use this then add some regular powder highlighter over the top for a more shocking effect or add more on to the beauty blender before dabbing it onto the face.

You can find this at any Superdrug or at:
http://www.superdrug.com/Make-Up/Face/Face-Highlighter/Gosh-Lumi-Drops-Vanilla-002-15Ml/p/631800
Gosh Lumi Drop
Gosh Lumi Drop Swatch

Friday, 26 May 2017

Too Faced 'Love Lights' Prismatic Highlighters - Review and Swatches

Too Faced 'Love Lights' Prismatic Highlighters

Since I did my blog post on Too Faced Melted Matte Lipsticks I have been dying to try their highlighters, seeing how beautiful the packaging and the actual highlighter is has made me lust after them for quite some time. Deciding to bite the bullet and buy all three shades of the 'Love Lights' Prismatic Highlighters while there was 10% off at Debenhams as this will be the cheapest they'll ever be at $22.50 each and no delivery charge as I spent over $40.

The packaging is the cutest highlighter packaging I have got before, the heart shape with metallic sheen to it, the weight of the packaging/product and the mirror inside (perfect for getting small details like applying mascara). This is just the outside of the package as well, the inside is even more beautiful than the outside as well! I like the raised Too Faced curved writing on top and the large print on the back saying shades as when all of them are out it is difficult to get them in the right boxes again unless you check the sides and match the metallic colours up.

It almost seems a shame to touch the perfect heart of highlighter inside the packaging, all of them with the raised 'TF', there is a lot of product inside the pan as well, looking around the edges I was expecting to see the pan close but you can't see it at all. I don't think I have seen such a photogenic highlighter either (I took about 50 before I decided to cut it down for the sake of my phone storage).

The formula is very rich and creamy, it feels almost velvety to touch and very very pigmented. I did one swipe around the edges of the heart to start the swatch then went back in just to help it pick up on camera but even then it wasn't fully showing up so I had to do a close up of it to really show it off. From left to right the shades go; Blinded By The Light, You Light Up My Life then Ray Of Light last. Blinded By The Light is an almost white gold shimmer shade, You Light Up My Life is a gold shade then Ray Of Light (my favourite) is a very pigmented almost rose gold shade.

The swatches aren't that wowing apart from Blinded By The Light what really pops compared to the others but all have a really nice shimmer to them which you can definitely build upon. I'm not sure if they are really worth $22.50 each as there isn't anything special about the shades, I think you mostly pay for packaging but if you like to add to your collection like I do then they are really pretty.


http://www.debenhams.com/webapp/wcs/stores/servlet/prod_10701_10001_123614908999_-1


MUA Luxe Shimmer Sheets - Review and Swatches

MUA Luxe Shimmer Sheets

Since I've been adding to my make up collection my make up bag has been getting bigger and bigger with more products I want to try out through every day use making my bag bulky and heavy. Surprisingly the biggest out of all of them in my highlighter which is normally is four pan palette size or a larger compact on its own so seeing these shimmer sheets I have been excited to try them out to see if I can slim down my make up bag for every day use or on the go use. So far they only have two shades; rose gold and white gold but hopefully they will bring out more ready for summer to test out.

To start off with I tried the rose gold shimmer sheets as this is the one I was most looking forward to using as I love rose gold highlighters. It is really weird to open the book and tear a page out to rub it on my hand for a swatch, the paper itself is like blotting paper with a almost silky texture. I rubbed it for about a minute to get maximum pigmentation and it really paid off, they are like a glitter glow than a pearl look but I expected that from the name of it. It is a really pretty shade but I will have to use a lot less when I actually use it on my face as it is highly pigmented and as I have such pale skin it will really stick out but will look really good with a bronzer in summer.

The white gold is completely different from the rose gold, not only did I rub for the same amount of time for a swatch but I used it in the exact same way. Unfortunately I didn't get any pigmentation, it did get some glitter but more like a little bit of glitter spilt on my hand. I was really looking forward to this as the other shade was a little too dark for me, but I could still use it for below the brow when I am going for a more natural look.

Overall I love the idea of these, the rose gold one is high in pigment and as there is 30 sheets this would be really good for going away on holiday to save on weight in the make up bag area or for on the go in general use. I would definitely recommend the rose gold but I wouldn't personally recommend the white gold as the pay off isn't as good but for $3 per booklet it is worth trying it out!.

http://www.superdrug.com/Make-Up/Face/Concealer/MUA-Luxe-Shimmer-Sheet-Rose-Gold/p/727450

http://www.superdrug.com/Make-Up/Face/Concealer/MUA-Luxe-Shimmer-Sheet-White-Gold/p/727452


Friday, 19 May 2017

Birchbox May - Products I got and Which I Would Buy Again

 Birchbox May

May's Birchbox is all about 'It's all in the details' so for this month they wanted to zoom in on all aspects of life where the small things really matter. In the information booklet provided in the box it says "This month we're all about the little changes that can make a big difference to your daily rituals" then they introduce the products in the box. Some of the brands I recognised already and others are completely new to me and so far this is the box I am really excited to use as some of the products in it I already wanted to try out!. This month we also got to choose which shade Marsk Mineral Eyeshadow we recieved out of Fifty Shades (a grey toned pigment) or Vanilla Frosting (a very sparkly white pigment) which I chose as I wasn't keen on the Fifty Shades as it wasn't unique for me having the same shades in multiple palettes unlike Vanilla Frosting which is completely unique and I really wanted to try. I like the simple box design but it didn't completely wow me like previous month boxes have, but it is still pretty and fits in nicely with the other draws I have received.

 To start off with I want to talk about the Marsk Mineral Eyeshadow as this was which one I instantly had to try. The packaging is nice with the cream and see-through tub showing off the sparkling pigment. It is a little difficult to get it open without it going everywhere however as you have to pull the cap off as you can't shake it out like I thought you might of been able to which is a shame as you can waste some without meaning to. A little goes a long way though, in the photo I placed my fingertip to the product without applying pressure and it was around enough for one eye, it spreads really evenly as well without clumping which I was worried about as this is the first loose eye shadow I have used and I thought it would just go everywhere and I would have no control over it. I tried it first with a dry brush before making it damp and using it then for a bigger payout. The sample size will last me months as well! But it is quite affordable for the full size of $14.49. This will be perfect for summer or even a festival look with how shimmery it is or even just using it to make the bellow the eyebrow pop.

 As you've probably read already I have been using the Benefit Porefessional for the past few months which I love so when they sent me a sample size of the Matte Rescue primer that I have been dying to try out so was pretty excited for it. The packaging like the full size which is nice and they do give you quite a lot considering a blob covers your whole face if not your t-zone so it will last a while. This one unlike the other one I have is a gel formula which is nice to try out and smooths down to make my skin feel really soft and made my oily skin not a problem while I've been wearing it. I have to say that I am starting to love this more than the one I already have. Once the sample has run out I will definatly invest in it again, it is a little costly at $23.50 but it is well worth it to keep oily skin at bay!.

Since we are talking about primers this is the first ever lip primer I have tried out! I'd heard of Obsessive Compulsive Cosmetics before as they're lip sticks are meant to be amazing so I was really excited to try this. Since I normally wear long lasting liquid lipsticks I decided to try out it with normal lipstick for a 3 course BBQ to really test it out and I am happy to let you know I still had a full layer of lipstick on without having to reapply! It may of faded slightly but that is amazing considering how much eating and drinking I was doing! This is definitely going to be perfect for a night out and at only $15 for the full size it is worth the price!.

I love trying new mascaras so this little gem Birchbox sent this month is my new favourite! Doucce have really excelled themselves with this mascara, the wand has an almost choppy look with different lengths to really grab every lash. I have had so many compliments on how nice my lashes look from using this mascara! It separates them completely without clumping making them almost look like fake lashes with how long and voluminous they are. I am really impressed with the wand and the formula as well as how cheap it is at $18 for a full size version of it! The only thing is there is slight smudging at the end of the day but apart from that it is really good!.

The last product I got in my Birchbox this month is a hair mask from Kueshi for damaged hair which is amazing! Not only does it smell fantastic but even after the first time using it my hair feels incredible soft and looks shiny. The sample size is big enough to use a few times to really try it out which is good and I'm so glad I don't have another dry shampoo! Not only is this working but it is a nice treat once a week to relax with in the bath as it does need a little time to settle in and work it's magic. The full size is $10.50 which is quite cheap as well so it won't break the bank every time you want to treat your hair.

Since this month Birchbox also started their new rewards system I did buy a couple of extra things from the Birchbox shop to use up the points I had got through reviewing the products I'd received over the past 5 months (It has gone so quick!) so I headed to the shop and I'll add in what I brought and the free present I got with the promo code they had on end of last month.

Since I normally stick to liquid concealers I thought I would try a cream concealer to see if it will last longer and look better throughout the day than the liquid one as I had heard that cream is much better. This is why I chose to buy Benefit Boi-ing 1 & 2 which claims to be industrial-strength concealer to instantly camouflage dark circles and discolouration for a natural-looking finish without creasing or fading which sounded amazing. The darker shade, boi-ing 02 is slightly too dark for me but I used it first for my dark circle then used the lighter shade ov
er the top to even it out. I have to say that a little really goes a long way when it comes to cream concealers and I did find that when you do put a little too much on it does crease, I was hoping this would work miracles on the fine lines near my eyes with my bags but it didn't. I do like it but I don't think it was worth the $17.50.


The freebie I got with the promo code I had at the end of last month was a lipstick from LAQA & CO called Cheeky Lip, the colour is much like a bright pure red colour which isn't my style but it was free so I'll still give it a go! The applicator is a little awkward to apply with as it is really rounded so you can't get the thin parts of your lips, it feels creamy on the lips but unfortunately doesn't last that long.

If you would like to try use the link below to get £5 off your first box 


https://www.birchbox.co.uk/invite/exploringmakeup